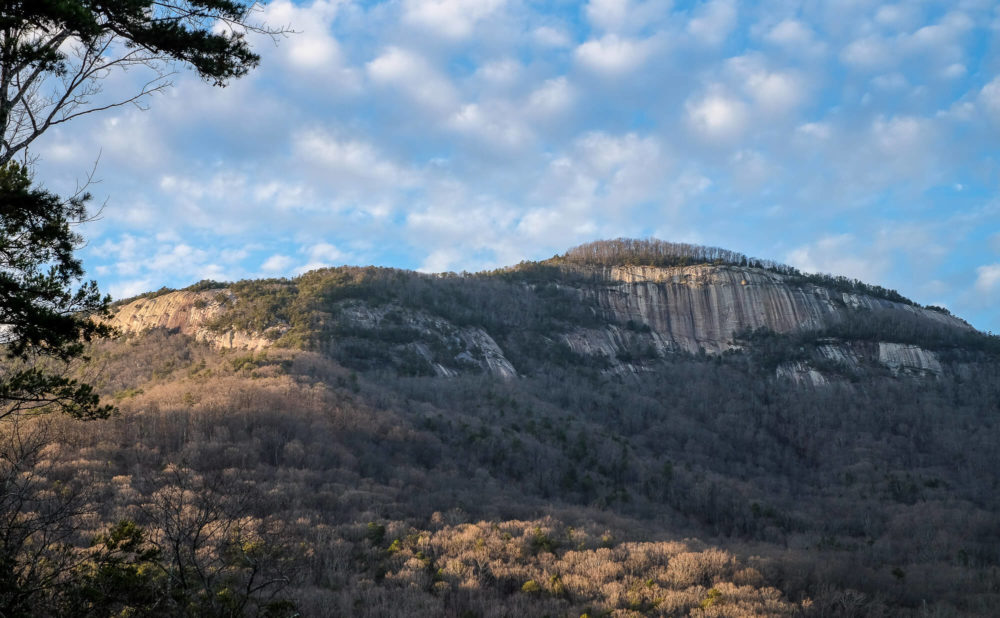
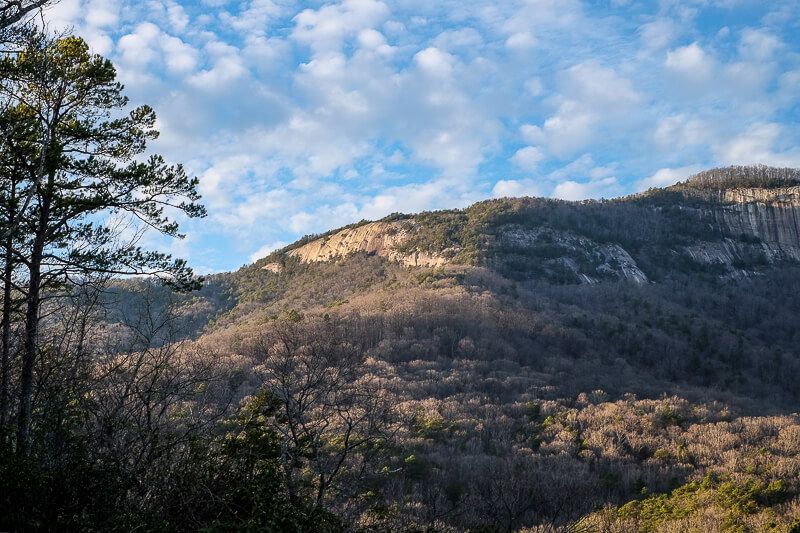
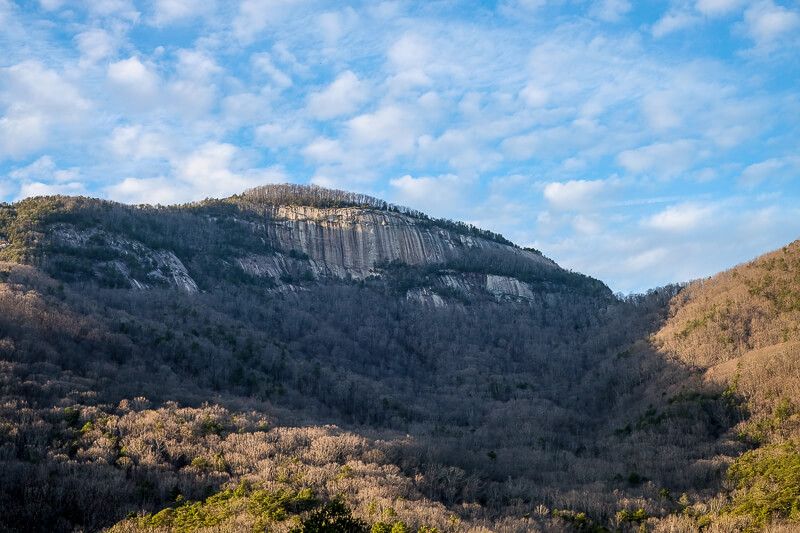
One of the most iconic and hardest trails in the area has to be the Table Rock Trail. If you’re new to the area, Table Rock is a mountain located less than an hour from Greenville. It’s easily recognizable by its granite, south facing dome. It is beautiful. And oh yea, you can hike to the top of it for some killer views. But are you prepared?
The Table Rock Trail is located inside Table Rock State Park. The park itself has numerous trails, but the Table Rock Trail has to be the most popular. And it is popular. Expect the parking lot to fill up quick in the mornings on weekends year round.
But the main thing to keep in mind when hiking Table Rock is its elevation. This is not an easy hike. Upon my 3rd hike to the summit of Table Rock in 2021, it may just be the hardest trail I’ve ever hiked. This is due not only to the steepness of its elevation, but also its length. You are basically on a freaking stairclimber to the top.
So read on to make sure you know what you are getting into.
Read Next: The Best Places to Go Hiking Near Greenville
Distance: ~7 miles roundtrip
Difficulty: Very Strenuous
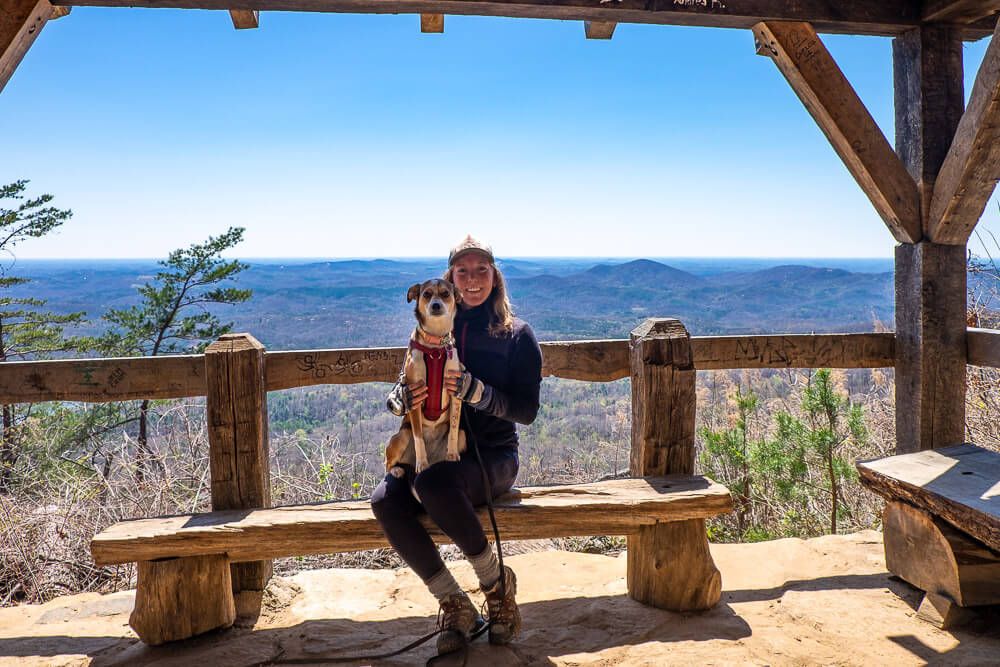
Dog Friendly: Yes
Trailhead: Located within Table Rock State Park, there’s a parking lot for the trailhead
Fee: There is a fee to enter the State Park, see the Park Website for current admission prices ($6 per adult in 2021)
Elevation Change: ~2,300ft
Time: 4-6 hours
Table Rock Trail
When should you go?
The first thing I’m going to address is when you should hike this trail. It’s super hard if the elevation change above hasn’t clued you in on that. I’m in decent shape, but maybe not cardio-for-2-hours shape. I definitely huff and puff my way up the mountain.
Each time I’ve hiked this, I’ve been passed by younger people and those in insane good shape, so if that’s you – you may not have any problems with this hike.
But for the rest of us, I would not hike this in the heat of the summer. It will be hot. And trust me, you’ll get hot on the way up. Let’s not have a heat stroke you guys. I’ve hiked this in January, May, and March. May was pushing it, but it was doable. Avoid the heat if you can.
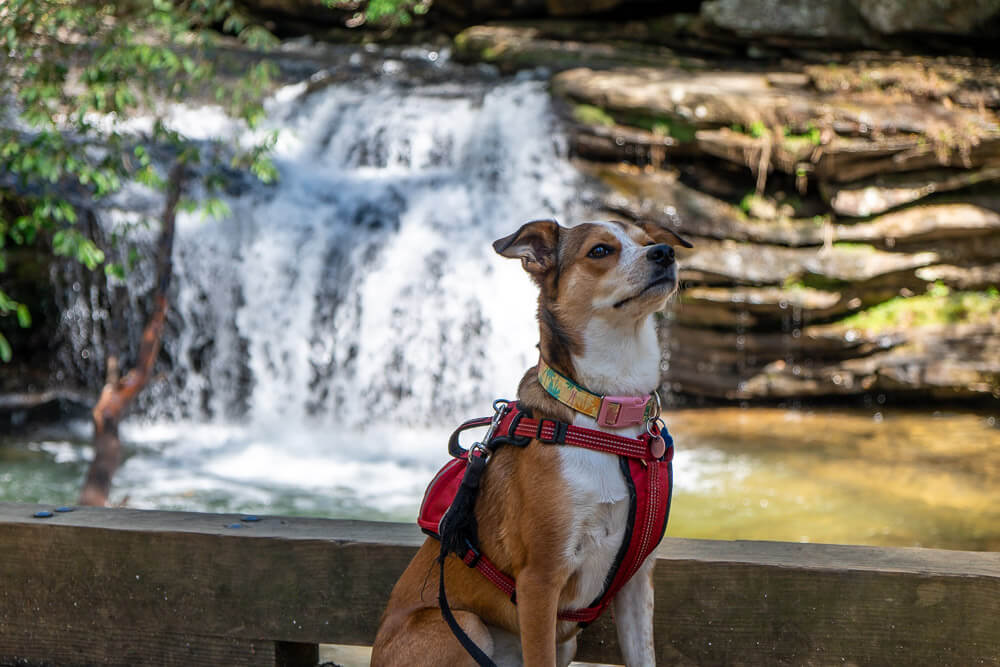
This goes doubly if you have a dog with you.
Other than that, make sure you get there early on the weekend to score a parking spot. Or plan to go during the week.
One last thing to keep in mind is how long it takes to hike this trail. Each time I’ve hiked to the end of the trail it’s taken me about 5.5 hours to do the whole roundtrip journey. That’s with us taking breaks on the way up, stopping at the numerous viewpoints for awhile, and then booking it on the way down.
So make sure you set aside enough time to hike the whole thing. This goes doubly in the winter when it starts getting dark at like 5pm. You do not want to be hiking down in the dark.
First half of the hike
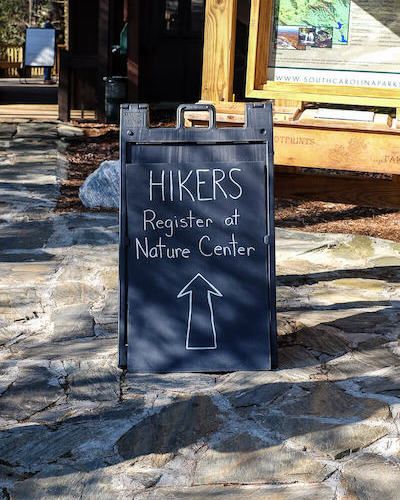
The trailhead is located at the Nature Center. Every hiker needs to register where you basically put one person’s information down in case you get lost and they need to come find you. (The kiosk is right at the Nature Center – you can’t miss it.)
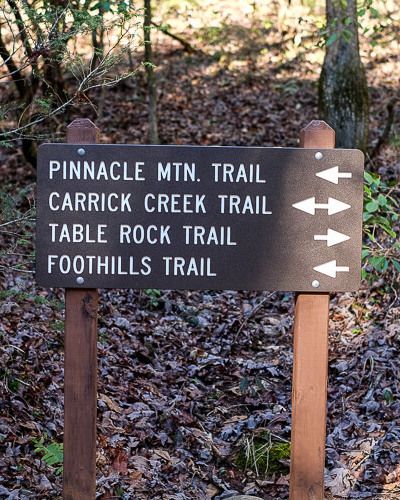
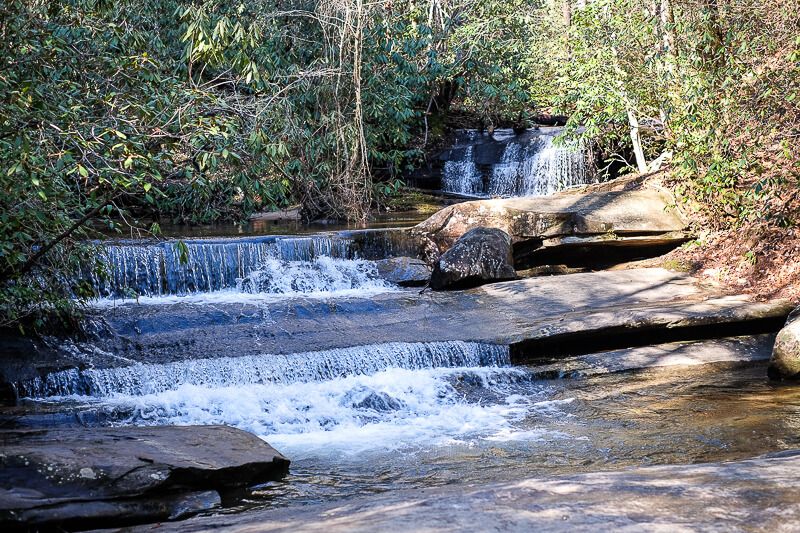
The first half mile of the Table Rock Trail is relatively easy. There are several waterfalls and bridges as you start to make your way upwards. You’ll also pass by a couple of intersections as other trails in the park branch off, but follow the arrows towards the Table Rock Trail (red blazes) and you’re good to go.
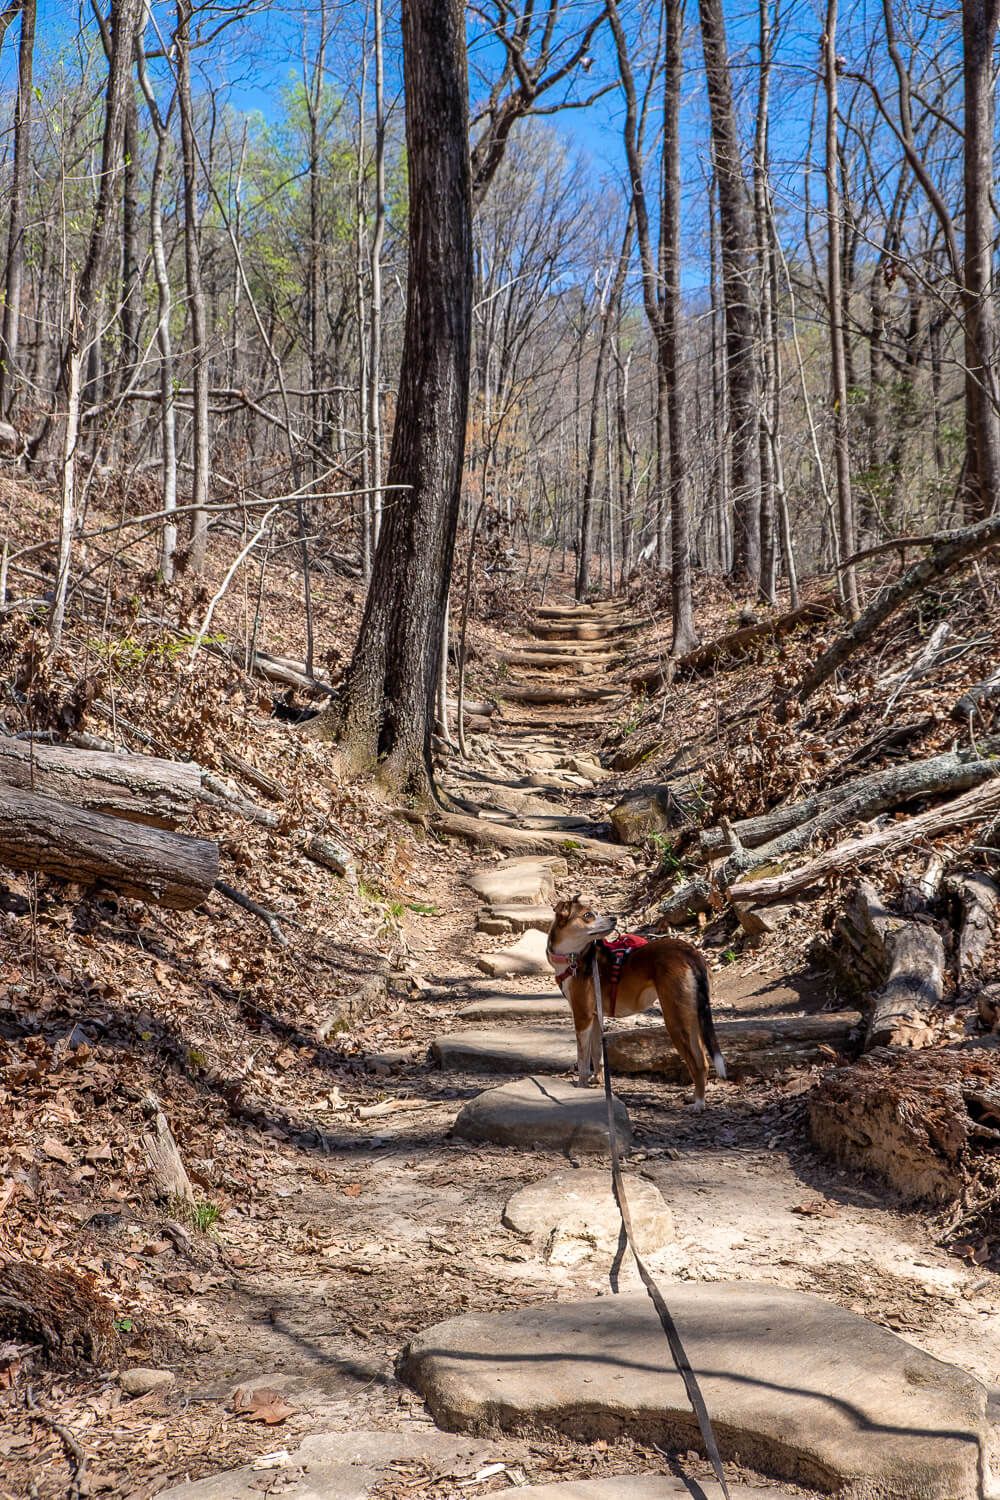
After that though, things start get…rough. I’m talking very steep. Stairs. Nonstop. Panting. Gasping. Dying.
At least those are my thoughts. My face goes red and I definitely sound like I’m dying. Steep trails are one thing, but literally climbing steps up a mountain is another.
Though I routinely see a bunch of college or high school aged kids blowing past me, so again, if that’s you OR you are in great cardio shape, this may not be as hard.
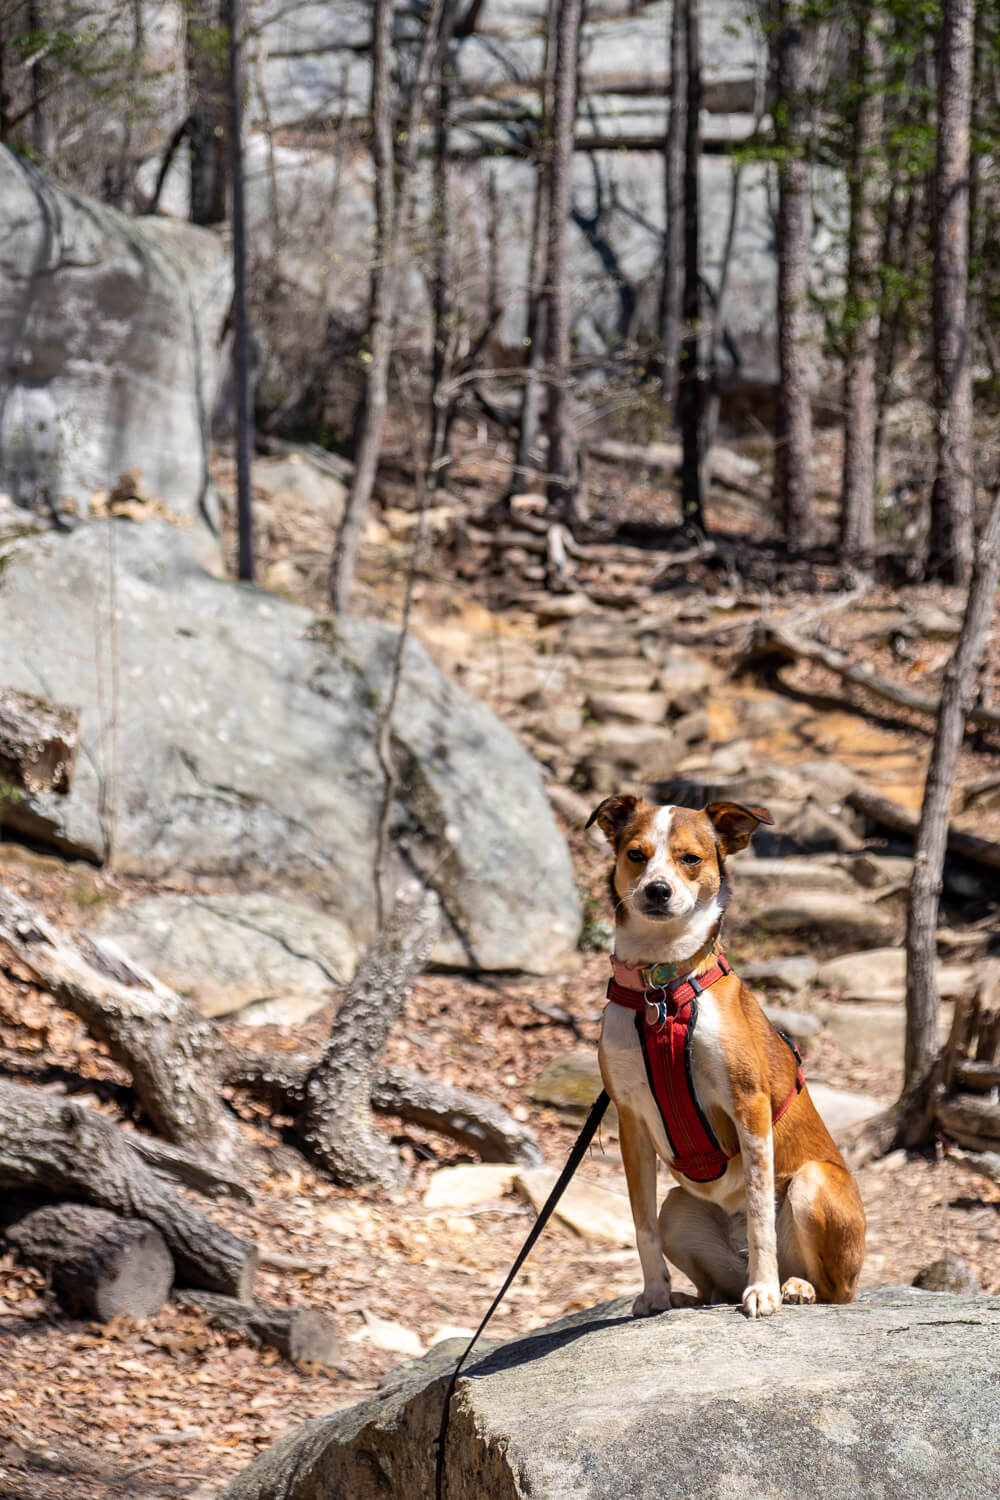
Once you get past the waterfalls and the next half mile of stairs or so, the hillside changes. Large boulders and rocks are strewn about and the trail even weaves in and out between them. There were also a few less steep, perhaps even flat parts of the trail. I’d use these to slow down and catch my breath.
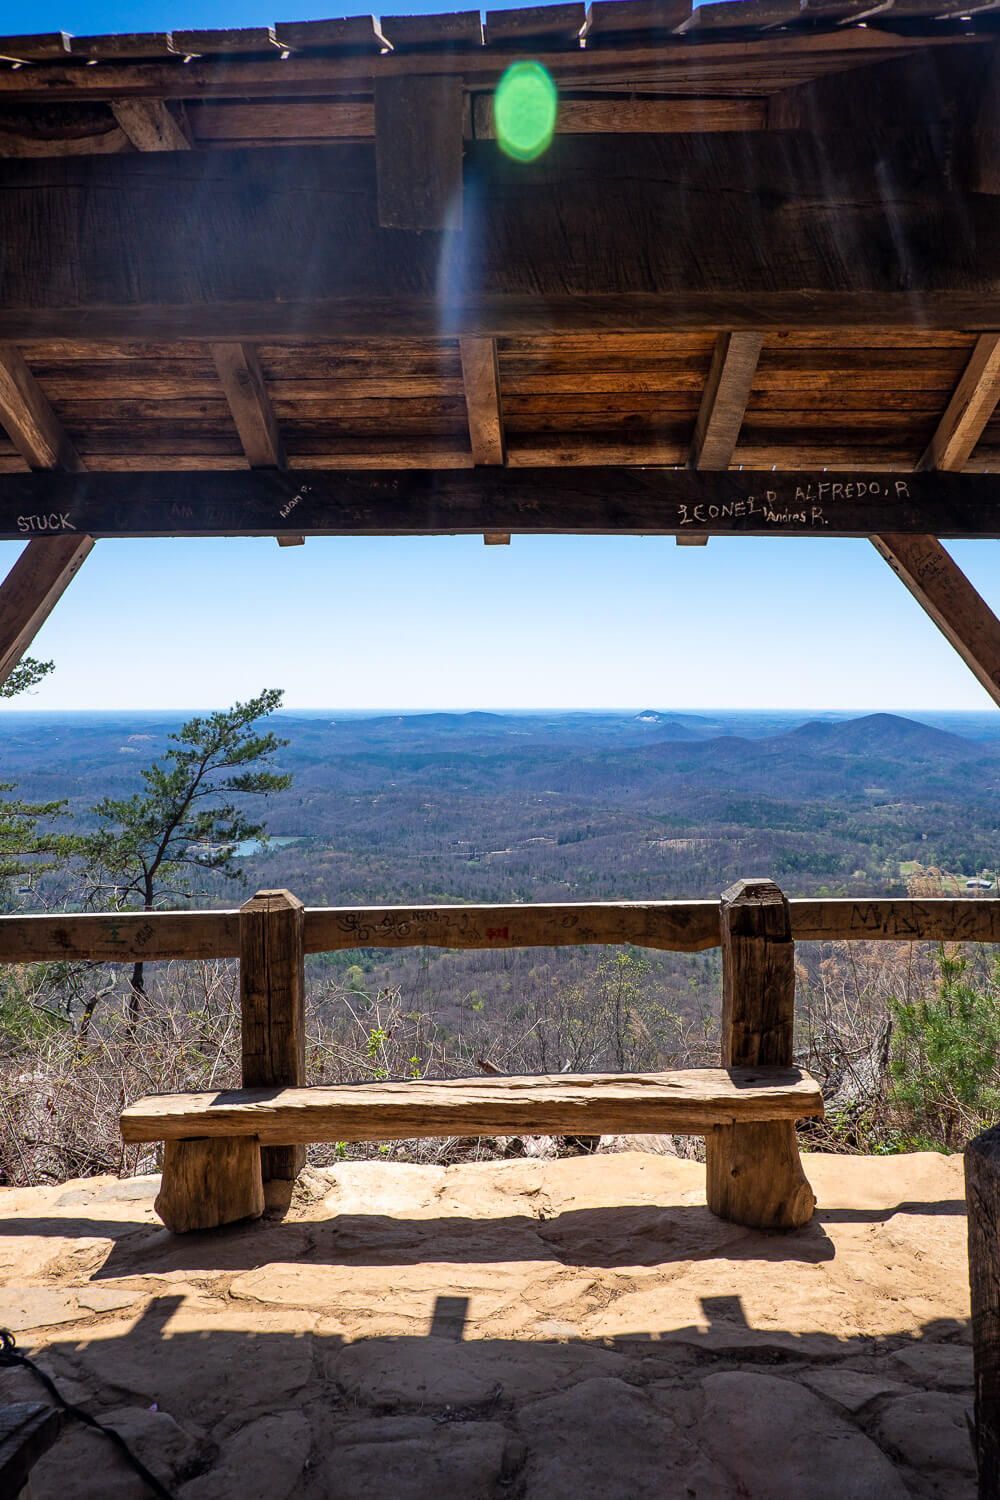
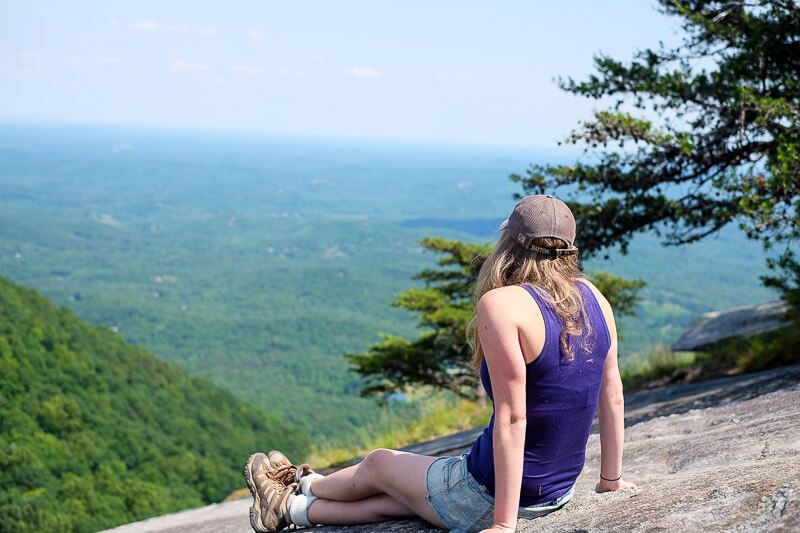
The first half of the trail ends at a small shelter and its amazing view to the south. And it’s pretty much halfway up at ~1.8 miles. (Though the first half of the trail does have a bit more elevation than the second.)
I remember the first time we turned the corner and saw the shelter, relief flooded through me. We made it halfway. We’d get to rest. We’d have an amazing view. Hell, I think each time I’ve hiked this trail I’ve had this exact same feeling.
And it is one hell of a view.

A few things to keep in mind when you make it here. The shelter itself is very small, so depending on the crowds that day, you may not be able to squeeze in.
There used to be a big wide granite face about 10-20ft up past the shelter where most people would sit. However on my last hike there were several downed trees through here shrinking the space and reducing access.
Regardless of where you go to relax, definitely take it all in.
Now, as you refuel on hopefully some snacks and water, you have an important decision. Do you want to keep going? To be honest, on my very first hike on the Table Rock Trail, this was as far as I made it. Mostly due to poor timing. I made it back down the mountain just as it was getting dark.
But if you want to go ahead and turn back, I don’t think there’s anything wrong with that. It’s a tough hike to this shelter and you do get a pretty good view. So you do you and listen to your body.

Second half of the hike
Ok so you are soldiering on. Now I would like to say that the second half of the trail is easier…but I can’t. There are two relatively flatter parts of the trail along the ridge, but they don’t last.
First you’ll continue up the trail past the shelter and continue up for about another quarter mile or so before you’ll come to the intersection with the Ridge Trail. Stay to the right (red blazes) towards Table Rock Mountain.
Then you’ll have a nice flat-ish stretch of trail. Enjoy it! One of the hardest sections is coming up.
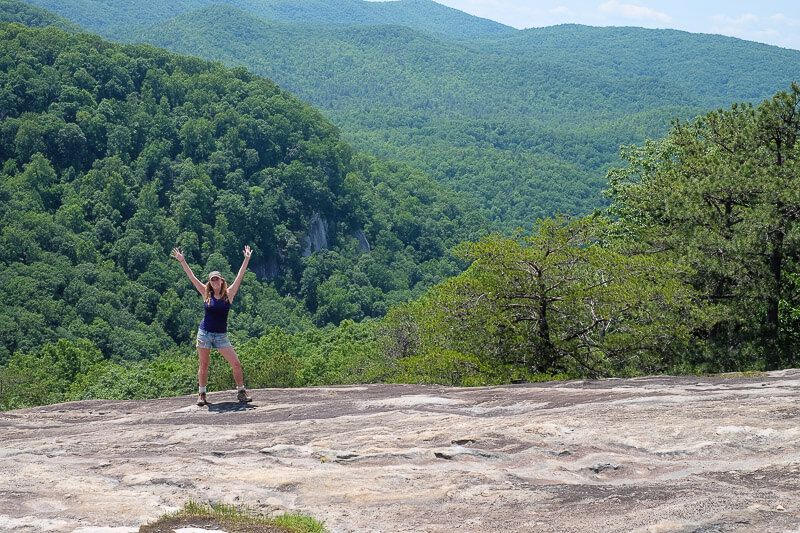
The climb up Governor’s Rock is steep, but now instead of steps, it’s just rocks and boulders. You’ll do more scrambling here so be super sure of your footing. It doesn’t look as steep, but I think it’s technically harder.
Luckily there’s a great view at Governor’s Rock to stop and catch your breath at. Definitely do so as you still have almost a mile to go.
From there, keep going up the hill to the top of Governor’s Rock. Then you get another short flat section as you approach the summit of Table Rock Mountain.
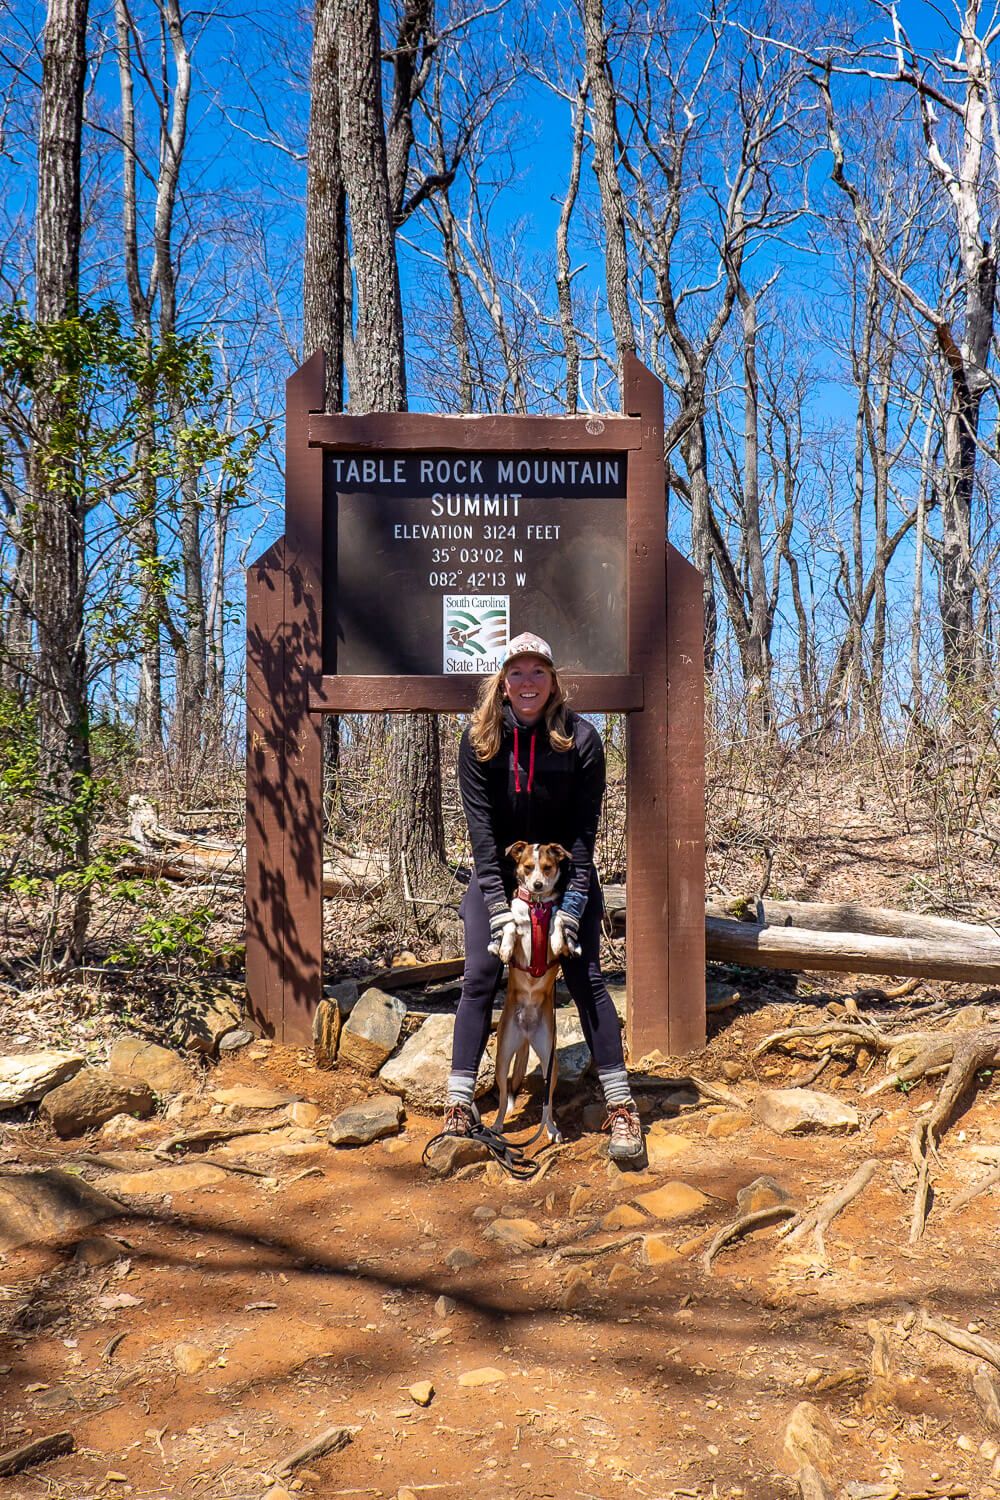
After another steep, rocky scramble you’ll make it to the summit. However the summit is actually not at an overlook. But you can’t miss the giant sign on the left side of the trail. (And I of course needed celebratory photos of it.)
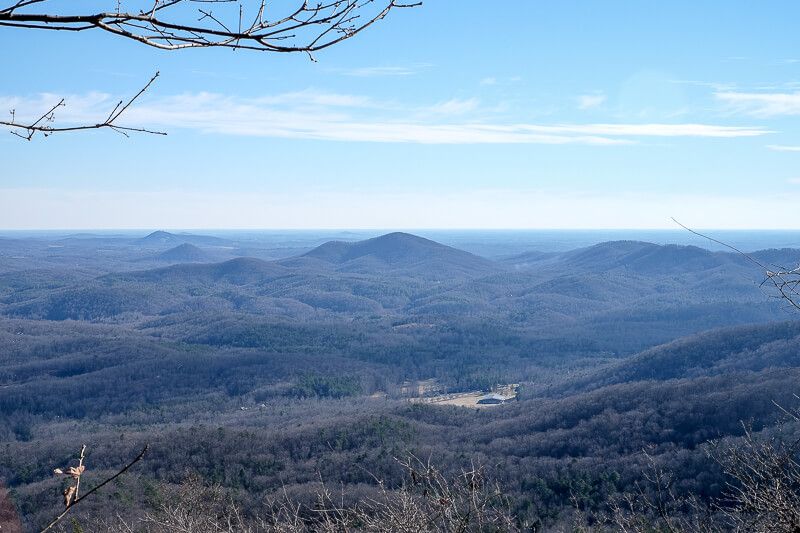
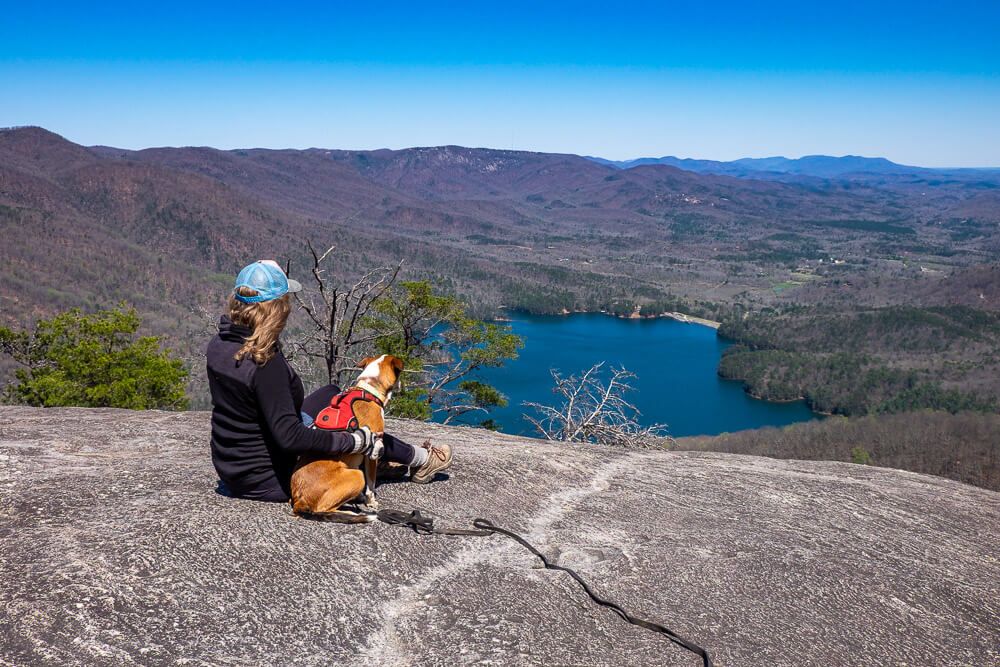
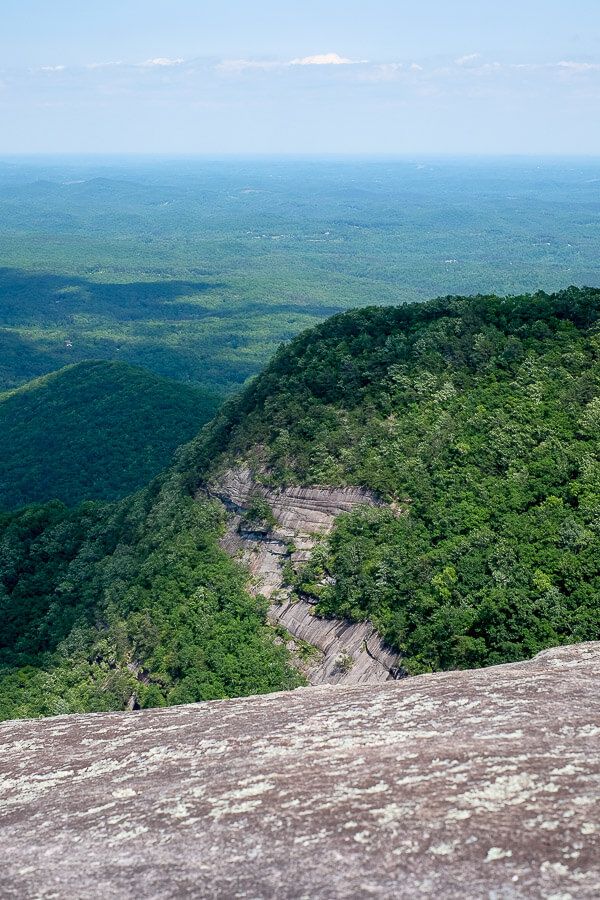
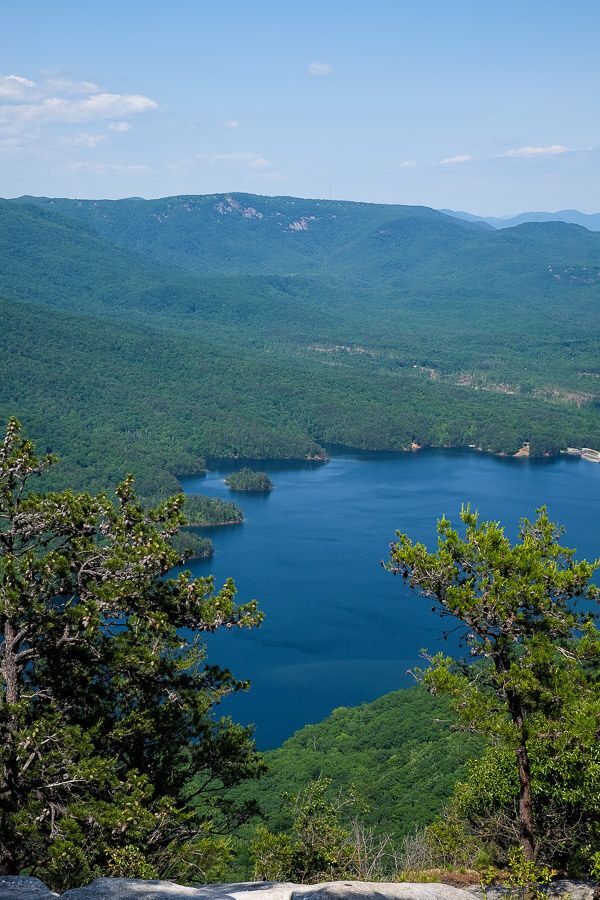
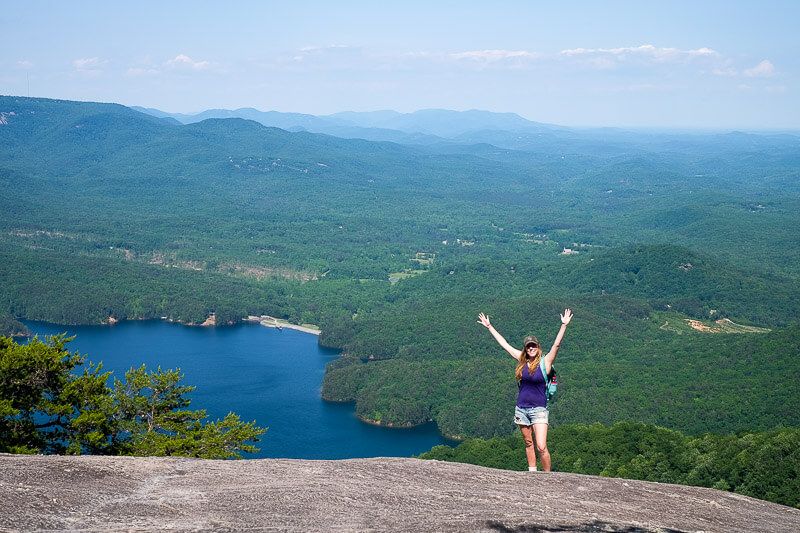
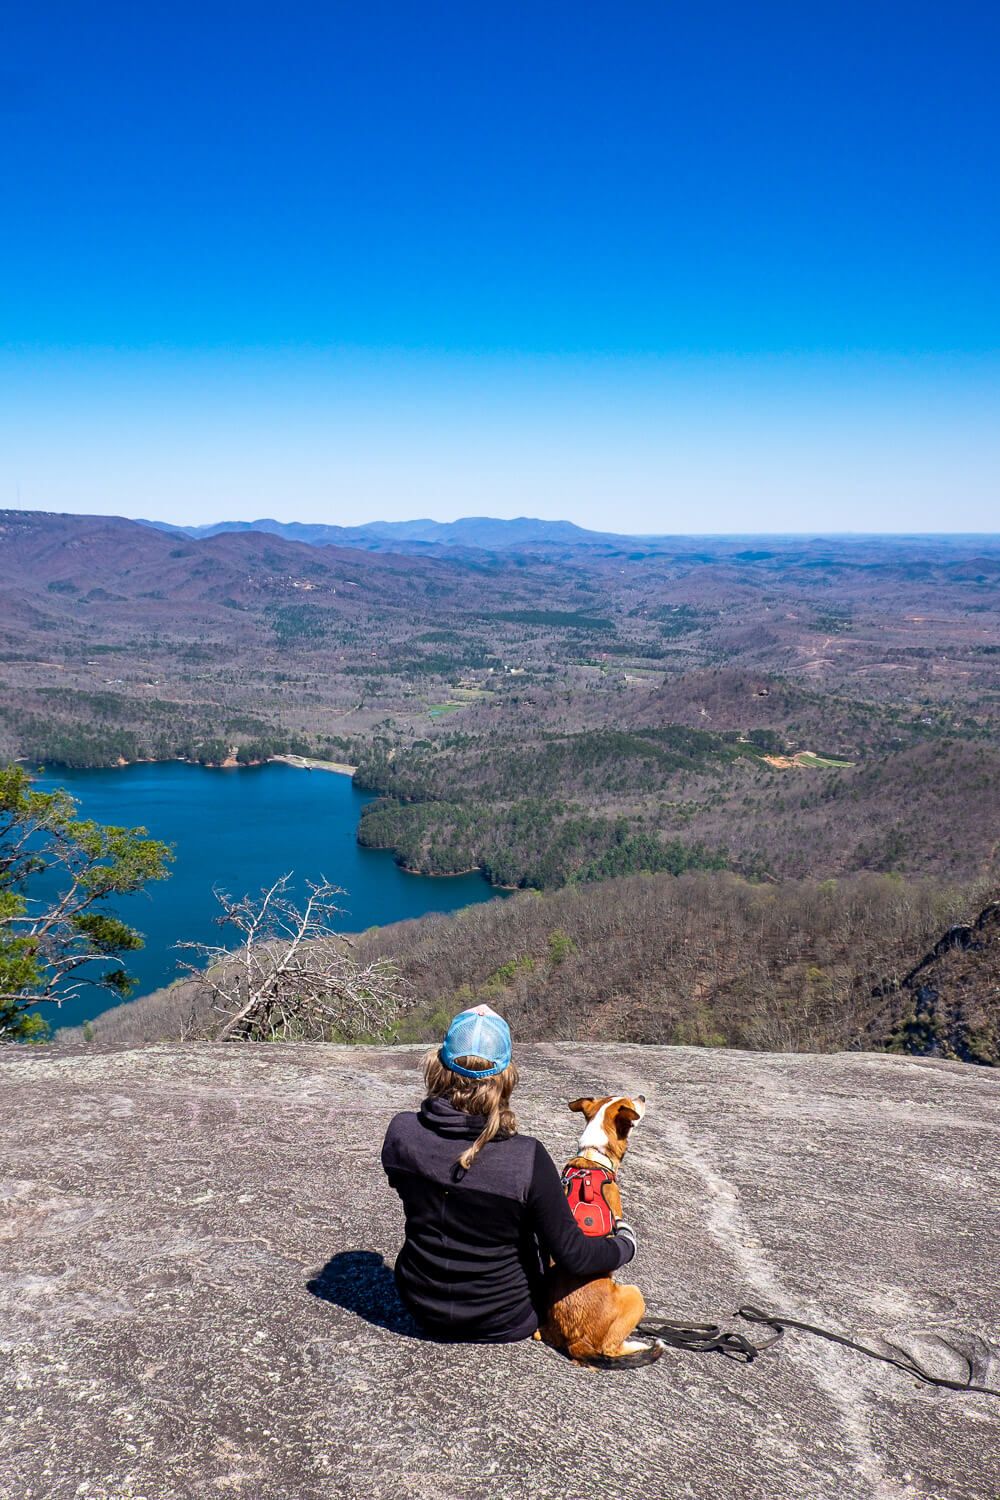
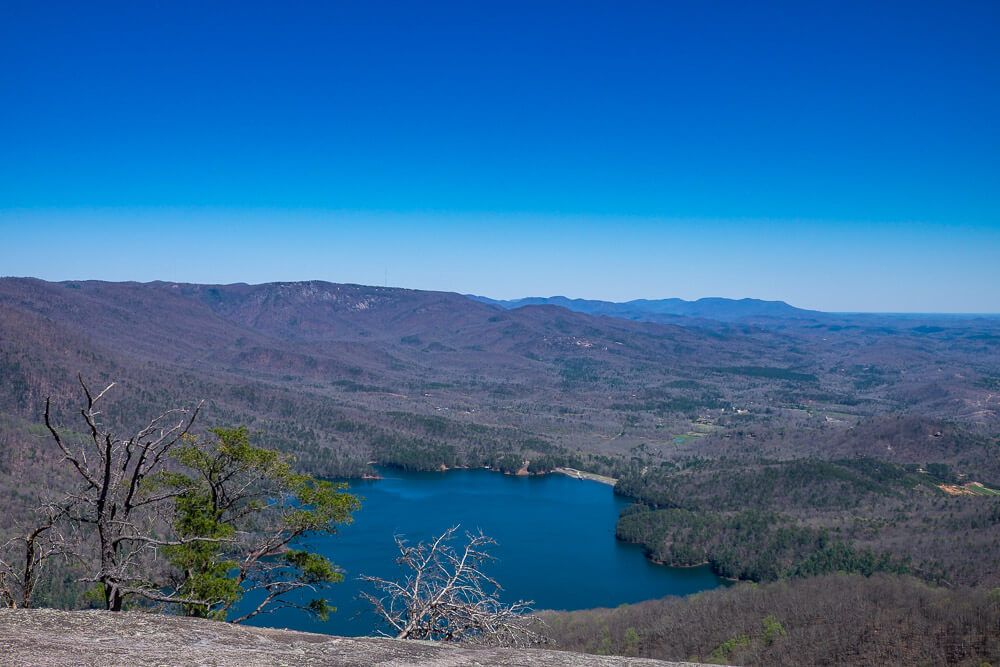
After the summit you’ll have about another 1/3rd of a mile down to the main viewpoint. Yes it is down (and down quite a bit). There will be other viewpoints that you’ll see along the way, but keep following the red markers until you reach the final overlook.
And it is magnificent. Words don’t do it justice.
If you don’t see the lake, keep following the trail. There’s an overlook only about 2 minutes from the summit sign, but this isn’t the final one. Keep going until you see the lake.
It feels…amazing to reach the top. I’ve done some tough climbs before but this one is definitely one of the hardest I’ve ever done. By far. (Perhaps even the hardest.)
Every time I paused on the way up, my legs begged me to stop. To quit. To give up. But I didn’t. And then as I sat up there, on top of Table Rock Mountain, I felt immensely proud. I had climbed the mountain.
I’ve felt this way each time I’ve hiked the trail.
If you also make it, CONGRATULATIONS! That is no mean feat. Stay up there as long as you want to. Hopefully you brought some snacks and water to chow down and refuel on.
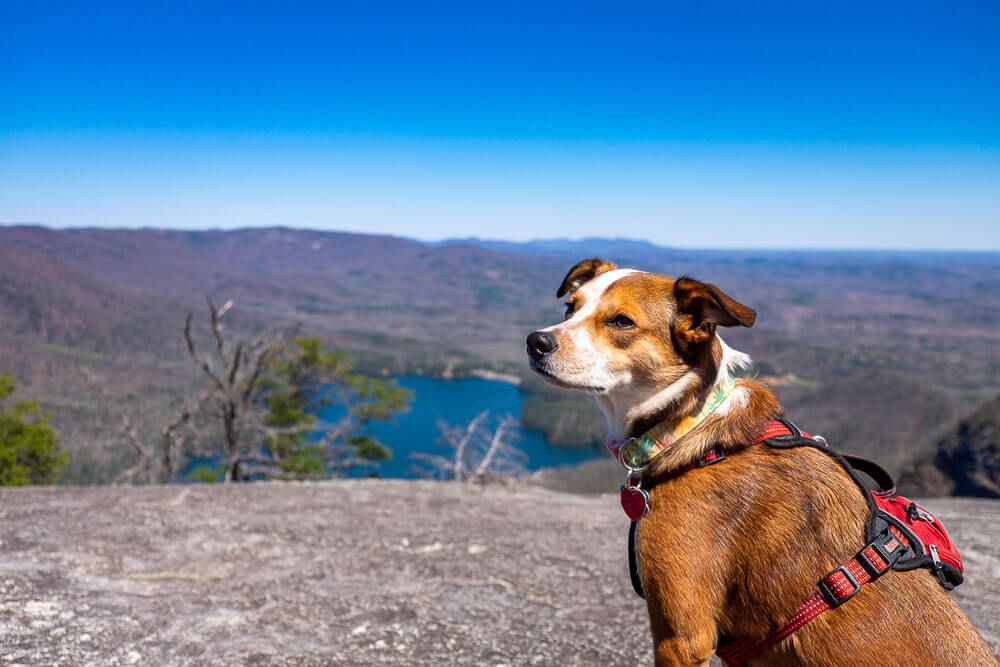
Gaze out across the reservoir and drink it all in. If you have a keen eye, you might just be able to spot Caesar’s Head as well.
Now I would like to say that the climb down is gentle and nice. But no. The way down is just as brutal. My knees are not the best and they, well, hurt coming down. And the further down I went, the more my legs shook. At one point I knew that if I stopped moving, my legs might just collapse.
As you’re leaving the park, don’t forget to pull off at the scenic overlook between the Nature Center and the East Gate Entrance. You’ll get an unobstructed view of the mountain. And you might just appreciate it more after you realize you just climbed it!
Looking for something similar? If you’ve hiked Table Rock and you want more, think about heading to Pisgah National Forest and hiking Looking Glass Rock.
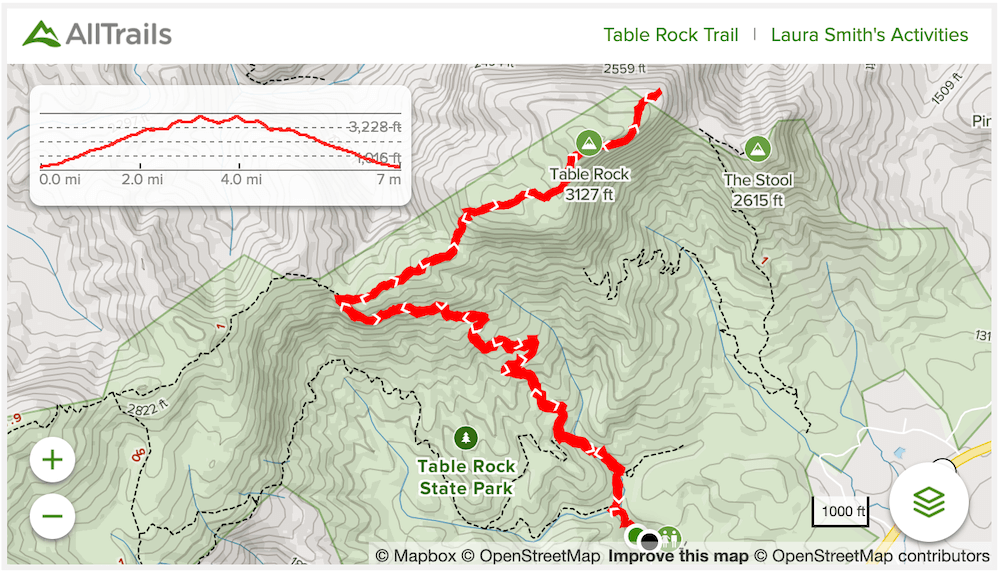
Trail Maps
There are a couple of maps on the Park website for you to reference. The first is more of a campground map, and the other has the hiking trails on it.
I’ve also included my track from All Trails below that will show you the main viewpoints
Click the image or the buttons to view the map in more detail.
What Do You Need to Bring?
Water. This should be obvious. You will need water. And probably more than 1 water bottle’s worth. If you decide to hike all the way to the top, I would bring 2 water bottles. We passed a girl on her way down the mountain, and as she stepped over a stream, she told her friends she wished she could fill up her water here. And if you are bringing your dog, make sure you have enough for them as well.
Snacks. Hopefully this is obvious too. This is a tough trail. Your body will need to refuel. Just throw in some granola bars, fruit, and crackers in your bag.
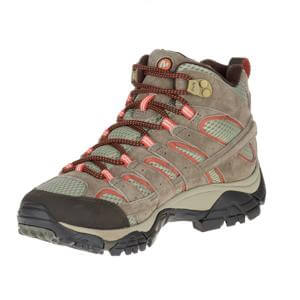
Good Hiking Shoes. Now I don’t think you’ll need legit hiking shoes per se, but you’ll need tough shoes. Good athletic shoes will work, though if you have hiking shoes, I would wear them. But please don’t climb this in like flip flops or flats. Your feet will hurt and you’ll definitely ruin the shoes.
Extra Layers. This one depends on the time of year you decide to hike. In the fall, winter, and spring, I would bring a couple of extra layers to throw on be it a jacket, a hat, or some gloves. The hike is hard and I stripped off all the layers I could on the way up. But the viewpoints at the top are exposed. It will be colder and windier. You’ll want to pull everything back on.
Your Dog? Yep, you can totally bring your dog! Ellie had an amazing time on the hike. But she is a very athletic dog. If you have a smaller dog or one that is older or not as athletic, you may not want to hike the whole way. Be sure to keep your dog leashed.
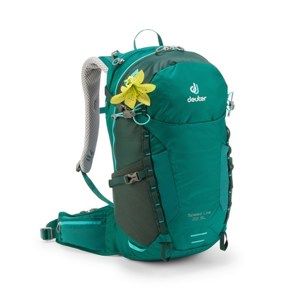
Some of my favorite hiking gear:


What Else Can You Do at Table Rock State Park?
More Hiking. So it’s a state park, of course it has more than one trail. In fact there are 5 more trails though two of them start several miles up the mountain. And there are 2 easy trails that won’t leave you out of breath (too much) – the Lakeside Trail & Carrick Creek Trail.
Swimming. No Table Rock State Park doesn’t have a pool. But it does have a lake with a sandy beach. And during the summer there is a lifeguard on duty. So head on over to Pinnacle Lake in the summer and try jumping off the diving boards.
Boating. While you can’t bring your own boats to Pinnacle Lake, you can rent them. Fishing boats, kayaks, and even paddle boats can be rented by the hour or day depending on the season.
Fishing. You can fish in both lakes year round and catch a couple of different kinds of fish. Fun fact! I suck at fishing…and I always want to throw the fish back. They always look so sad.
Where Can You Stay?
Camping. There are 94 campsites with electric and water in the park. Some of them are even big enough for an RV. And yes there are bathrooms and showers close to the campgrounds. These sites start at $25/night.
However if you want to get a little rustic, there are a couple of trailside, primitive campsites located across Hwy 11 on the Lake Oolenoy side. You will have to hike a bit to get to them and there are no real toilets or electric. There are six sites and they start at $17/night.
Cabins. Camping a little too rustic? Want a cozy cabin to hunker down in? Well you are in luck. Table Rock State Park has 16 cabins. Though the site says that only 14 of them have furnishings, heat, A/C, a porch, etc. so I’m not sure what’s up with the other 2. Definitely check out the details of your cabin before you rent.
Hope you have an amazing time conquering the Table Rock Trail!


I just did it yesterday. I am 79 years old and did well except for leg cramps. I am happy and proud that I did it, but would not try it again !
Hi Arnold! Hiking to the top of Table Rock is definitely an accomplishment. I have knee problems from playing rugby in college and while I was hiking back down they started to really ache. So I definitely understand the leg cramps. And though I’m glad I finally made it to the top, I’m not sure I’d want to do it again either!
Hi! My husband and I are working on our SC Parks Ultimate Outsider and he really wants to hike Table Rock and I’m coming around. My biggest concern is the lack of bathrooms on the five hour hike! I know this is personal, but how did you deal with that?
Thanks!
Hi Meredith! Sorry for the delay in responding! And you’re right, there are no bathrooms on the trail. I’ve done a lot of hiking and camping, so I’ve gotten used to just squatting behind the tree. Luckily I’ve only ever had to pee in those situations. For toilet paper, I bring a roll, hand sanitizer, and a ziplock bag to stash the used paper and then throw the whole bag away once I get back to a trash can. (I personally don’t like littering in the woods.)
In the beginning I was very nervous about just squatting. But it’s something I’ve gotten used to over the years.
Thanks for the reply! I am new to hiking, but have enjoyed it so far! I also wanted to be sure it was ok to go off the trails a bit, but it seems like it is.
I did this hike all the way to the top a year ago and while the views were amazing, I don’t think I’ve ever had so much knee pain after doing anything until doing this. I couldn’t bend my knees at all the next day and I was only 25. Haha.
I completely understand Jenna! My knees wanted to DIE on the way up (and especially on the way down). I’ve had some bad knee pain but nothing quite like the pain I got from hiking Table Rock.
Excellent write up on the Table Rock trail. My daughter (24) and I (54) hiked this today. I opened my mouth and told her I wanted to hike to the top again before I get much older and have knee replacement. The last time that I hiked this trail was about 40 years ago while in Boy Scouts. I quickly learned why the gap in years. Today was TOUGH but we made it. It kicked my BUTT! A good day on the mountain with my daughter!
Lessons learned:
Eat a very good breakfast.
Pack more snacks and lunch.
Carry more water and PowerAide.
So glad you made it to the top! This is definitely a hard hike (since it took me two tries to do it!). Definitely will keep your tips in mind for my next hike to the top!
I hiked it this past Saturday with 2 Air Force kids 26 years old, I’m 59, 1 hour 17 minutes to the top, I was looking for fastest anyone had hiked to the top.
That time is incredible! You guys were definitely booking it. I unfortunately don’t know what the record is though for fastest hike to the top. You may have it!
So glad to hear the comments on how difficult this hike is! My sister and I hiked this trail with a group of teens a few years ago. At the time I was 62 and was able to keep up with the tail end of that group! We made this climb in memory of our Mom who wanted to ,but was unable because of a heart condition! We were in tears when we reached the summit at the beauty we saw,wishing she could have experience it with us! FYI, there are some essential oils that REALLY HELP WITH CRAMPS! I am 65 now and living at the foot of Old Rag Mt. In Virginia. It is tempting me everyday!
Thank you for this post, this was the most helpful and informative posting of all the research I had done before the hike. I hiked it two days ago and still can’t believe I made it. It was definitely the most difficult hike I’ve done, and I hike a lot. The worst part was the kids (I’m 54) who bounded along the trail with seemingly little effort, jerks. The best part is the satisfaction. It took me and my wife 6 hours and 20 minutes.
Congratulations Mitchell for making it to the top! And I definitely agree that Table Rock may be the most difficult hike I’ve ever done as well. And I hike a lot too!
And I’m super glad you found this post helpful! I sometimes wonder if I provide way too much information.
(And I agree about those young kids too lol.)
I am 63 and have been pretty sedate the last 2 1/2 years. I knew this was going to be tough but I have always been able to complete what I put my mind to. I quickly found out I didn’t have enough water with me. My 17 year old grandson didn’t seem the least bit fazed. We made it to the base of the last vertical climb and I looked at the terrain and said nope I’m done. Disappointed I turned around. Another hiker passed us during a rest period, returned a few minutes later and gave me the last liter of water they had. They also stayed with us the rest of the way. We still had 2 miles of descent to go. That was a very trying time for me. Made it down finally with a little park help the last little bit.
A week later I tried it again with a more experienced hiker who made sure I paced myself better, more power snacks and electrolytes. It took us a long time but we made it to the summit. Well the other guy did. I am saving that for when I go with my grandson again soon. I waited and had a good, needed, rest.
I cant wait to do the climb again and celebrate with my grandson.
Kewi updating original comment. I went back about ten days later with two grandsons 17 and 12. We made it to the summit checked out the trail terminus view and got back down. Glad to have shared this with my grandsons.